

Bochs Hacking Guide
This guide will get you started hacking the Bochs IA-32 (x86) processor emulator. It is a result of a research project, aided by Dr. Michael E. Locasto, in which I modified Bochs and the Linux kernel to implement an exploit defense system based on disabling some of the CPU's instructions. If you want to use Bochs to experiment with architecture changes, this guide will get you going in the right direction.
Bochs is similar to virtual machine software like QEMU, VirtualBox, and VMWare, except that all instructions are implemented in C++ code. Therefore, Bochs is very slow, but also extremely versatile. Once you know your way around Bochs, you can do all sorts of cool things like modifying the behavior of existing instructions, or even adding totally new instructions to the architecture. Studying the Bochs source code is also a great way to learn about x86.
This guide will walk you through the steps of compiling Bochs and running a modern Linux kernel inside it. After that, you will be introduced to Bochs' source code, and you will be shown how to add and modify CPU instructions.
This guide was written for Linux-based operating systems so it assumes the reader has basic Linux skills (can use the command line, can compile software, knows what the kernel is, etc.), although it should apply to other operating systems too.
Compiling Bochs
If your Linux distribution's software repositories include Bochs, you can use that instead of compiling the source. However, we will be modifying Bochs later on in the guide, so you should compile it yourself.
To get started, download the latest stable version of the Bochs source code from Bochs' SourceForge Page. At the time of writing, the current release is 2.6.2, so that's the one this guide will be using.
After you've downloaded the source code, extract it:
$ tar xvf bochs-2.6.2.tar.gz
$ cd bochs-2.6.2
Bochs provides a bunch of build configurations for various operating systems:
$ ls .conf.*
.conf.amigaos     .conf.linux  .conf.macosx   .conf.sparc         .conf.win32-vcpp
.conf.everything  .conf.macos  .conf.nothing  .conf.win32-cygwin
These are scripts which run the "configure" script with various command line arguments enabling or disabling certain features. We will be writing our own script, though, since none of these work very well in all cases. Create a file called "my_configure.sh" and put this inside it:
#!/bin/bash

# This is the folder that bochs will install to. Feel free to change this to
# anything you like. By default, we install bochs to a 'my_build" folder in the
# current directory.
install_path=$(realpath ./my_build)

# Create the installation folder if it doesn't exist.
mkdir -p "$install_path"

# Run Boch's configure script with the features that we need.
./configure \
  --enable-smp \
  --enable-x86-64 \
  --enable-all-optimizations \
  --enable-long-phy-address \
  --enable-configurable-msrs \
  --enable-disasm \
  --enable-fpu \
  --enable-alignment-check \
  --enable-3dnow \
  --enable-svm \
  --enable-vmx=2 \
  --enable-avx \
  --enable-a20-pin \
  --enable-pci \
  --enable-clgd54xx \
  --enable-voodoo \
  --enable-usb \
  --enable-usb-ohci \
  --enable-usb-xhci \
  --enable-cdrom \
  --enable-sb16 \
  --enable-es1370 \
  --enable-show-ips \
  --with-all-libs   \
  --prefix="$install_path"
This will configure Bochs to install to the "my_build" folder in the current directory. The other arguments enable most of Bochs' features, except, notably, networking. I can't get the network component to work no matter how much I try, so I'll leave it out of this guide.
To build Bochs, just run:
$ ./my_configure.sh
$ make -j 4
$ make install
This will compile Bochs and place the binaries in "./my_build/bin". Change into that folder, then, in the next section, we will make a disk image and install Tiny Core Linux in Bochs.
$ cd ./my_build/bin
Creating a Disk Image
To install an operating system in a Bochs VM, it will need a hard disk. Bochs uses regular flat files as hard disk images. However, we can't just use any size of file. We have to create one that fits a specific hard disk geometry (cylinders, heads, and sectors per track).
The size of a disk image is equal to:
disk image size (bytes) = cylinders * heads * spt * 512
To make things easy, we will fix the number of heads at 8 and the number of sectors per track at 63. We will then select the disk size by varying the cylinder count. If we want an N megabyte disk, then we calculate the number of cylinders as follows:
cylinders = N * 1024 * 1024 / 512 / 8 / 63
We can put this into a script called "create_disk_image.sh" to automate it:
#!/bin/bash
# Usage: ./create_disk_sectors <megabytes> <path>
# For example, to create a 4GB disk image, run:
#  ./create_disk_sectors 4096 disk.img

megs=$1
heads=8
sectors_per_track=63
cylinders=$(expr $megs \* 1024 \* 1024 / 512 / $heads / $sectors_per_track)
sectors=$(expr $cylinders \* $heads \* $sectors_per_track)
dd if=/dev/zero of=$2 bs=512 count=$sectors

echo "Disk image file [$2] was created."
echo "Geometry: cylinders=$cylinders, heads=$heads, spt=$sectors_per_track"
Now, if we want to create a 1GB disk image to install an operating system, we can run:
$ ./create_disk_image.sh 1024 bochs-disk-image.img
2097144+0 records in
2097144+0 records out
1073737728 bytes (1.1 GB) copied, 3.47051 s, 309 MB/s
Disk image file [bochs-disk-image.img] was created.
Geometry: cylinders=4161, heads=8, spt=63
Make sure you save the "Geometry" line of the output, as it's needed to configure Bochs to use the disk file, which we will do in the next section.
Installing Tiny Core Linux
Now that we've compiled Bochs and generated a disk image, we're ready to create the Bochs configuration and install an operating system. In this section, we'll install Tiny Core Linux.
Start downloading CorePlus-current.iso right now, since it will take some time.
Creating a "bochsrc" file
The first thing we need to do is create a "bochsrc" file. This is the Bochs configuration file. It configures all of the hardware parts of the virtual system. Here's an example bochsrc file that will work with Tiny Core Linux and the disk image we created in the last section.
# System configuration.
romimage: file=$BXSHARE/BIOS-bochs-latest
vgaromimage: file=$BXSHARE/VGABIOS-lgpl-latest
cpu: model=corei7_ivy_bridge_3770k, ips=120000000
clock: sync=slowdown
megs: 256
boot: cdrom, disk

# Hard disks.
ata0: enabled=1, ioaddr1=0x1f0, ioaddr2=0x3f0, irq=14
ata0-master: type=disk, path="bochs-disk-image.img", cylinders=4161, heads=8, spt=63

# CDROM
ata1: enabled=1, ioaddr1=0x170, ioaddr2=0x370, irq=15
ata1-master: type=cdrom, path="CorePlus-current.iso", status=inserted
This configuration defines a system with 256 megabytes of RAM, a hard disk, and a CDROM drive. The CPU is set to emulate the features of the Intel Core i7 Ivy Bridge 3770K processor. The "clock" line determines how Bochs will synchronize the VM's clock with the host system's clock. When set to "slowdown", performance is sacrificed in favor of reproducibility and keeping the clock in sync with the host system. The "boot" line sets the boot order.
Make sure the hard disk "path" is set to the path of the disk image file you created in the last section, and that the cylinders, heads, and spt settings are the ones from the "Geometry:" line of create_disk_image.sh's output. Also make sure that the CDROM "path" is set to the location of the CorePlus-current.iso that you downloaded.
For more information about the bochsrc settings, see the bochsrc documentation.
Booting and Installing Tiny Core Linux
After you've created the bochsrc file and waited for the Tiny Core Linux ISO to download, you're ready to boot the virtual machine.
$ ./bochs -f ./bochsrc -q
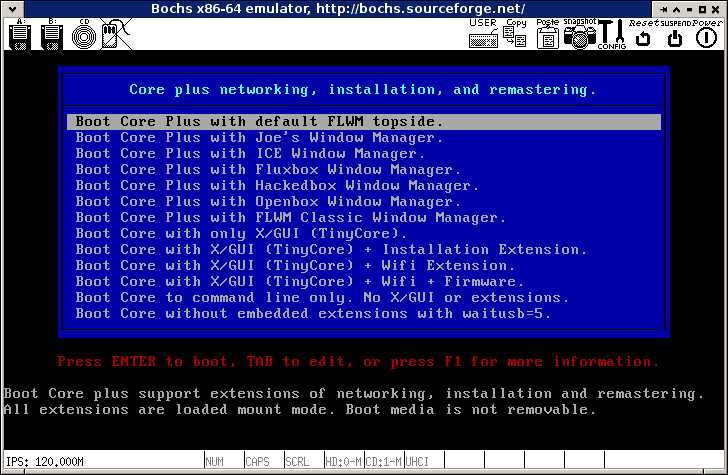
The Tiny Core Linux CD will begin booting. Select "Boot Core Plus with default FLWM topside."
After a few minutes, you should be presented with a Tiny Core Linux's desktop.
Hold the CTRL key while clicking the middle mouse button (mouse wheel) on the Bochs window to be able to control the mouse inside Bochs. Press it again to release your mouse cursor back to the host system.
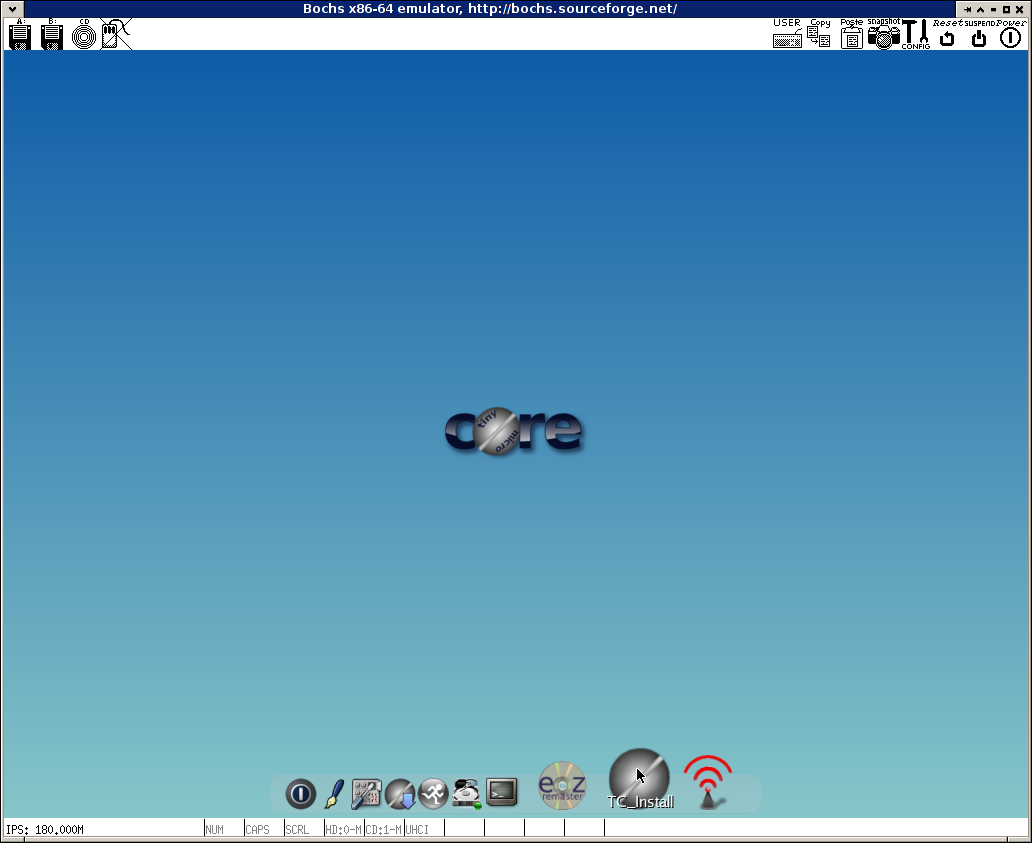
Click the "TC_Install" icon (second from the right) to start installing Tiny Core Linux to disk. The installation process is very straightforward. Leave "Frugal" selected, check "Whole Disk", then select "sda". The next pages can be left on the default settings. On the last page, click "Proceed" to install.
If all went well, Tiny Core Linux is now installed to the disk image. To boot into it, shut Bochs down, edit the bochsrc to comment out the "ata1-master" line (the CDROM), then start Bochs again.
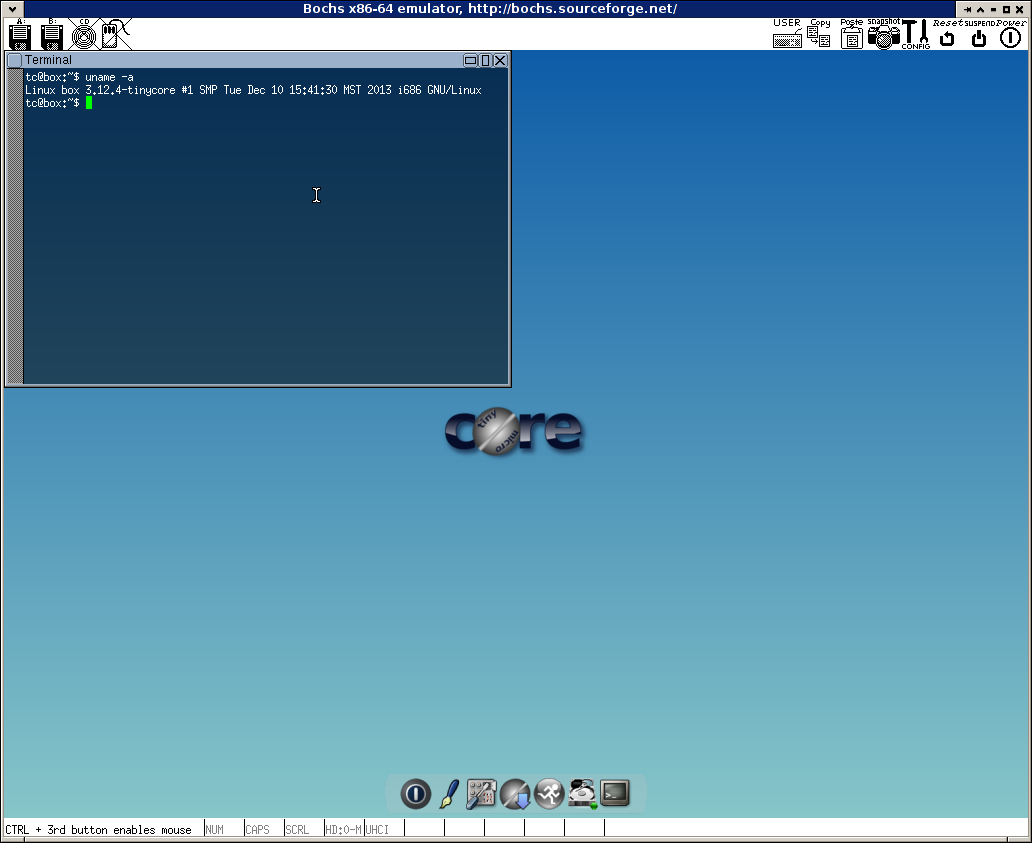
Now you have a recent Linux kernel running in Bochs! You can either stop here and play with it, or continue on to the next sections where we compile the Linux kernel ourself and install it in the Tiny Core Linux VM we just created.
Installing a Custom Kernel in Tiny Core Linux
Note: You can skip this section and move right on to the "Modifying Bochs" section if you aren't interested in making kernel modifications.
Building the Linux Kernel
At the time of writing, Tiny Core Linux comes with version 3.8.13 of the Linux kernel. We will be building version 3.12.4 and installing it in the Tiny Core Linux VM we created earlier.
This section of the guide is based on Tiny Core Linux's Wiki page about compiling a custom kernel.
Building the Linux kernel is easy. First, download and extract it:
$ wget https://www.kernel.org/pub/linux/kernel/v3.x/linux-3.12.4.tar.xz
$ tar xvf linux-3.12.4.tar.xz
$ cd linux-3.12.4.tar.xz
Download Tiny Core's kernel configuration and save it in .config.
$ wget http://tinycorelinux.net/5.x/x86/release/src/kernel/config-3.8.13-tinycore
$ mv config-3.8.13-tinycore .config
Run `make oldconfig`. Answer all of the questions with the default answer (Just hold the Enter key until it's done). Now run `make menuconfig`. If you want to make any extra changes, use this menu to make them, otherwise exit from the menu.
After you have done this, open the .config file in a text editor and change the CONFIG_CC_OPTIMIZE_FOR_SIZE=y line to end in =n. By default, Tiny Core Linux's config wants to build an extremely small kernel. We have of plenty space, so we can turn off this optimization.
The next two commands actually compile the kernel and some kernel modules. If you get asked more questions, just pick the default answer.
$ make bzImage -j 4
$ make modules -j 4
Note: If you are compiling an older kernel on a 64-bit system, you may have to add ARCH="x86" to all of your make commands.
Next, make a folder to hold the compiled kernel modules and install them there.
$ mkdir ./my_modules
$ make INSTALL_MOD_PATH="./my_modules" modules_install firmware_install
That's it! The kernel has been compiled. The bzImage is in ./arch/x86/boot/bzImage, and the modules are in ./my_modules. We will need these in the next two sections, when we install them into our Tiny Core Linux VM.
Mounting The Bochs Disk Image
So far we've created a Tiny Core Linux virtual machine with Bochs and compiled the Linux kernel. The next step is to install the kernel we compiled into the VM. To do that, we have to get access to the VM's filesystem. Fortunately, there are some utilities that make this very easy. We can use the kpartx tool to mount the raw disk image file.
Note: On Arch Linux, the kpartx tool is part of the "multipath-tools" package in the AUR. In Debian, you can apt-get install kpartx.
Start off with a shell script to mount the image. Save this in mount.sh.
#!/bin/bash
kpartx -a -v bochs-disk-image.img
mount -o loop /dev/mapper/loop0p1 /mnt/myimage
You may have to change the "loop0p1" to "loop1p1" or "loop2p1" depending on what else you are using your computer for.
Then, save this unmounting script in unmount.sh.
#!/bin/bash
umount /mnt/myimage
kpartx -d -v disk.img
The script mounts the disk image to /mnt/myimage, so create that directory.
$ mkdir /mnt/myimage
Finally, run the mount.sh script to mount the disk image. You might have to run it as root. In the next section, we will install the new kernel.
Installing the New Kernel
Tiny Core Linux is different from other Linux distributions in the way its root filesystem works. If you look in the mounted image, you'll find a structure like this:
# tree /mnt/myimage/
/mnt/myimage/
├── lost+found
└── tce
    ├── boot
    │   ├── core.gz
    │   ├── extlinux
    │   │   ├── extlinux.conf
    │   │   └── ldlinux.sys
    │   └── vmlinuz
    ├── mydata.tgz
    ├── onboot.lst
    ├── ondemand
    ├── optional
    │   ├── aterm.tcz
    │   ├── ...
    │   └── Xvesa.tcz.md5.txt
    └── xwbar.lst
When you start the machine, this isn't what you see mounted at /. Instead, the filesystem is somehow generated at boot time from these files. If you want to know more, see the Tiny Core Linux documentation. For this guide, all we need to know is that tce/boot/vmlinuz is the kernel bzImage, and we have to add the kernel modules to core.gz, which is a gzipped cpio file.
Backup the old files so you can recover if you screw up the kernel install.
# cp /mnt/myimage/tce/boot/core.gz /mnt/myimage/tce/boot/core.gz-backup
# cp /mnt/myimage/tce/boot/vmlinuz /mnt/myimage/tce/boot/vmlinuz-backup
To install the new kernel, first replace vmlinuz with the new bzImage.
# cp arch/x86/boot/bzImage /mnt/myimage/tce/boot/vmlinuz
Now, we'll need to rebuild the core.gz file with the new kernel modules. Copy it over to your system and extract it:
# mkdir core_extract
# cd core_extract
# cp /mnt/myimage/tce/boot/core.gz core.gz
# gunzip core.gz
# cpio -idv < core
Copy the new kernel modules into lib/modules and the new firmware into lib/firmware.
# mv ../my_modules/lib/firmware/ lib/
# mv ../my_modules/lib/modules/3.12.4-tinycore/ lib/modules/
Put everything back into a cpio file, and gzip it like it was. Then install it back to the disk image.
# find . | cpio -ov --format='newc' > core
# gzip core
# mv core.gz /mnt/myimage/tce/boot/core.gz
Unmount the disk image using the unmount.sh script we made in the last section, then start the VM. If you did everything right, it should be running the kernel you compiled.
So far we've created a Tiny Core Linux VM and installed a custom kernel in it. In the next section, we'll get to the really fun part, and the whole point of this guide: Modifying Bochs. We'll change the behavior of some instructions, add some new ones, and test our changes in the VM we just made.
Modifying Bochs
In this section you'll be introduced to the Bochs source code and walked through the process of modifying and adding instructions to the CPU. You'll be using the virtual machine we created above to test out your modifications.
Open up the Bochs source code directory (which you were using in the "Compiling Bochs" section), and you'll see something like this (subdirectories are in bold).
$ ls
aclocal.m4       cpu                 logio.cc        pc_system.cc
bios             cpudb.h             ltdl.c          pc_system.h
bochs.h          crc.cc              ltdlconf.h.in   plugin.cc
build            disasm              ltdl.h          plugin.h
bx_debug         doc                 ltmain.sh       README
bxversion.h.in   docs-html           main.cc         README-plugins
bxversion.rc.in  extplugin.h         Makefile.in     README.rfb
CHANGES          gdbstub.cc          memory          README-wxWidgets
config.cc        gui                 misc            TESTFORM.txt
config.guess     host                msrs.def        TODO
config.h.in      install-sh          osdep.cc        win32_enh_dbg.rc
config.sub       instrument          osdep.h         win32res.rc
configure        iodev               param_names.h   wxbochs.rc
configure.in     LICENSE             PARAM_TREE.txt
COPYING          load32bitOShack.cc  patches
There's lots of code here, but we'll be focusing on the cpu folder, which contains the C++ implementations of all of the x86 instructions. Let me highlight the important files.
-
cpu/ia_opcodes.h
This file specifies all of the CPU opcodes (instructions) and which C++ methods implement them.
-
cpu/cpu.h
The BX_CPU_C class, representing the system's CPU, is declared in this file. If you want to make modifications to other parts of the CPU, like adding a new register, this is where you do it. This file also contains the declarations of all the C++ methods implementing instructions.
-
cpu/fetchdecode.cc
In fetchdecode.cc, there is a table which maps the actual opcode numbers to the opcode structure created in ia_opcodes.h. This file also houses the fetch-decode cycle of the CPU.
-
cpu/fetchdecode64.cc
This is like fetchdecode.cc, except for 64-bit CPUs. Any changes you make in fetchdecode.cc should usually be mirrored in this file.
Carefully read through these files, and you'll have a good understanding of how the CPU is implemented in Bochs. The methods that implement actual instructions are declared in cpu.h, but are defined in many .cc files in the cpu folder. For example, cpu/arith32.cc defines the implementation of the 32-bit arithmetic instructions, including INC, ADD, SUB, etc. Read through some of these files as well, to get an idea of how instructions are implemented.
Turning XOR into ADD
With this basic understanding of the CPU in Bochs, we can start making changes. Just for fun, we'll change the XOR instruction to ADD the operands instead. This will probably break everything we try to run in our VM, but it will be fun to see how and where things break.
Note: This is a pretty lame example of modifying an instruction, so if you've already thought of another instruction you'd like to modify, try that instead!
The implementation of the variants of the XOR instruction are spread across logical8.cc, logical16.cc, logical32.cc, and logical64.cc. We'll only change the 32-bit register-XOR-register variant. So open up logical32.cc. You'll see the definitions for a bunch of 32-bit XOR variants:
BX_INSF_TYPE BX_CPP_AttrRegparmN(1) BX_CPU_C::XOR_EdGdM(bxInstruction_c *i)
// ...

BX_INSF_TYPE BX_CPP_AttrRegparmN(1) BX_CPU_C::XOR_GdEdR(bxInstruction_c *i)
// ...

BX_INSF_TYPE BX_CPP_AttrRegparmN(1) BX_CPU_C::XOR_GdEdM(bxInstruction_c *i)
// ...

BX_INSF_TYPE BX_CPP_AttrRegparmN(1) BX_CPU_C::XOR_EdIdM(bxInstruction_c *i)
// ...

BX_INSF_TYPE BX_CPP_AttrRegparmN(1) BX_CPU_C::XOR_EdIdR(bxInstruction_c *i)
// ...
What are these weird "EdGdM" things? They are abbreviations of the format of the operand. For example "Ed" means, essentially, a doubleword (32-bit) memory address or register. "Gd" means a doubleword (32-bit) register. The full list can be found in Appendix A, section A.2 of the Intel IA-32 Architectures Software Developer's Manual Volume 2.
To keep things simple, we'll only change the "EdGdM" variant. Its implementation looks like this:
BX_INSF_TYPE BX_CPP_AttrRegparmN(1) BX_CPU_C::XOR_EdGdM(bxInstruction_c *i)
{
  Bit32u op1_32, op2_32;

  bx_address eaddr = BX_CPU_CALL_METHODR(i->ResolveModrm, (i));

  op1_32 = read_RMW_virtual_dword(i->seg(), eaddr);
  op2_32 = BX_READ_32BIT_REG(i->src());
  op1_32 ^= op2_32;
  write_RMW_virtual_dword(op1_32);

  SET_FLAGS_OSZAPC_LOGIC_32(op1_32);

  BX_NEXT_INSTR(i);
}
Just change the "op1_32 ^= op2_32;" line (in bold) to "op1_32 += op2_32;". Now, all the XOR instructions of this variant become ADDs. You can also make Bochs log the fact that your modified instruction was executed by adding a line like the following.
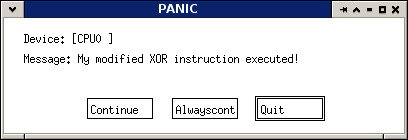
BX_PANIC(("My modified XOR instruction executed!"));
BX_PANIC will halt the processor and present you with a message box that lets you continue the execution or quit the simulator.
You can also use BX_ERROR, BX_INFO, and BX_DEBUG, which correspond to Bochs' different log levels. You can set the log level and log file in the bochsrc. By default, logs are sent to standard output.
With the change made, re-compile Bochs and see if the VM will boot.
$ ./my_configure.sh   # (You made this in the "Compiling Bochs" section.)
$ make -j 4
$ make install
$ cd my_build/bin
# ./bochs -f bochsrc -q
Surprisingly, the VM boots successfully (at least for me) despite the broken XOR instruction getting executed hundreds of times. You may have different results.
This was a simple (and rather dumb) example of how to modify an instruction in Bochs. Revert the instruction's code back to the way it was, re-compile Bochs, then in the next section, we will add a whole new instruction to the CPU.
Adding Registers and Instructions
In this example, we'll add a new register to the CPU, along with two new instructions for moving its value in and out of the EAX register. We'll call the new register "ENX" (N for "new"), and the two new instructions will be:
- RDENX: Copy the value of the ENX register into the EAX register.
- WRENX: Copy the value of the EAX register into the ENX register.
Adding the ENX Register
Adding a general purpose register to Bochs is easy. To do so, open cpu.h and find:
#if BX_SUPPORT_X86_64
# define BX_GENERAL_REGISTERS 16
#else
# define BX_GENERAL_REGISTERS 8
#endif
This is the number of general purpose registers. Change it to:
#if BX_SUPPORT_X86_64
# define BX_GENERAL_REGISTERS 17
#else
# define BX_GENERAL_REGISTERS 9
#endif
Next, find the register number definitions:
#define BX_32BIT_REG_EAX 0
#define BX_32BIT_REG_ECX 1
#define BX_32BIT_REG_EDX 2
#define BX_32BIT_REG_EBX 3
...
Add the following to name the new register:
#define BX_32BIT_REG_ENX 8
#define BX_64BIT_REG_RNX 16
That's all you have to do to add a general purpose register. If you want to add some CPU-specific storage that isn't a register (e.g. an internal buffer or cache), you can just add it as a member variable to the CPU class in cpu.h
Adding the RDENX and WRENX Instructions
Next, we'll add two 32-bit instructions that use our new RNX register.
First, we need to choose opcodes for our new instructions. We'll use 0F3B and 0F3C, since they are currently undefined for Intel CPUs:
- 0F 3B: RDENX
- 0F 3C: WRENX
To add these to the CPU, first add the implementations. Add the function prototypes to cpu.h alongside the others (search for "BX_INSF_TYPE NOP").
BX_SMF BX_INSF_TYPE RDENX(bxInstruction_c *) BX_CPP_AttrRegparmN(1);
BX_SMF BX_INSF_TYPE WRENX(bxInstruction_c *) BX_CPP_AttrRegparmN(1);
Add the implementations to data_xfer32.cc:
BX_INSF_TYPE BX_CPP_AttrRegparmN(1) BX_CPU_C::RDENX(bxInstruction_c *i)
{
    // Copy ENX into EAX.
    Bit32u enx = get_reg32(BX_32BIT_REG_ENX);
    set_reg32(BX_32BIT_REG_EAX, enx);

    BX_NEXT_INSTR(i);
}

BX_INSF_TYPE BX_CPP_AttrRegparmN(1) BX_CPU_C::WRENX(bxInstruction_c *i)
{
    // Copy EAX into ENX.
    Bit32u eax = get_reg32(BX_32BIT_REG_EAX);
    set_reg32(BX_32BIT_REG_ENX, eax);

    BX_NEXT_INSTR(i);
}
Next, add this to ia_opcodes.h.
bx_define_opcode(BX_IA_RDENX, &BX_CPU_C::RDENX, &BX_CPU_C::RDENX, 0, BX_SRC_NONE, BX_SRC_NONE, BX_SRC_NONE, BX_SRC_NONE, 0)
bx_define_opcode(BX_IA_WRENX, &BX_CPU_C::WRENX, &BX_CPU_C::WRENX, 0, BX_SRC_NONE, BX_SRC_NONE, BX_SRC_NONE, BX_SRC_NONE, 0)
Now, in fetchdecode.cc, replace...
/* 0F 3B /w */ { 0, BX_IA_ERROR },
/* 0F 3C /w */ { 0, BX_IA_ERROR },
...with...
/* 0F 3B /w */ { 0, BX_IA_RDENX },
/* 0F 3C /w */ { 0, BX_IA_WRENX },
Also replace the following (the difference is the "/w" has changed to "/d")...
/* 0F 3B /d */ { 0, BX_IA_ERROR },
/* 0F 3C /d */ { 0, BX_IA_ERROR },
...with...
/* 0F 3B /d */ { 0, BX_IA_RDENX },
/* 0F 3C /d */ { 0, BX_IA_WRENX },
Note: If you're adding an instruction that needs a ModR/M byte (our RDENX and WRENX examples don't), you have to update the BxOpcodeHasModrm32 table.
That's it. These instructions should work now.
Testing the New Instructions
We just finished adding a new register and new instructions to Bochs. Compile Bochs (see the previous sections if you've forgotten how), then we'll write a program to test the new instructions.
Here's a program written in GAS to test the new instructions and register:
.intel_syntax noprefix
.global main
.text

# If the new instructions work, this program should print:
# "EAX is 1337!"

main:
    # Put 1337 into EAX
    mov     eax, 1337
    # WRENX: Copy EAX's value (1337) into ENX
    .byte 0x0F, 0x3C
    # Zero EAX
    mov     eax, 0
    # RDENX: Copy ENX's value (1337) into EAX.
    .byte 0x0F, 0x3B

    # Push EAX onto the stack (second argument to printf)
    push    eax

    # Push the format string's address onto the stack (first arg to printf).
    lea     eax, format
    push    eax

    # Call printf.
    call    printf

    # Clean up the arguments on the stack.
    add     esp, 8

    # Return 0 from main().
    mov     eax, 0
    ret

format:
    .asciz "EAX is %d!\n"
Compile it with:
gcc -m32 test.s -o test
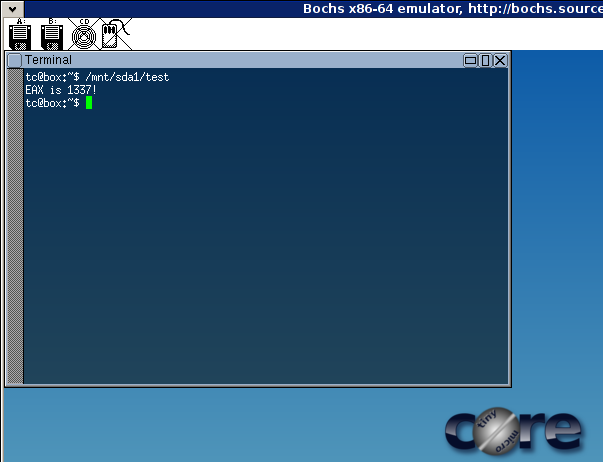
Copy the test binary into the VM. Put it in the root of the disk image and it will show up in /mnt/sda1/test. Start Bochs and run it. You should get "EAX is 1337!" proving that the new register and instructions work.
Of course, if you want the new instructions to work properly when they are used by two processes at the same time, you'll have to modify the Linux kernel to save and restore the ENX register across context switches. I won't cover that in this guide.
Useful Functions
Here are some functions that might come in handy when writing CPU instructions. There are many functions that are not listed here. Look for them in the implementations of other instructions.
-
Bit32u get_reg32(unsigned reg)
Returns the value of a 32-bit register. The 'reg' argument can be one of BX_32BIT_REG_EAX, BX_32BIT_REG_EBX, BX_32BIT_REG_ECX, etc.
-
void set_reg32(unsigned reg, Bit32u val)
Sets the value of a 32-bit register to 'val.' The 'reg' parameter accepts the same values as get_reg32's 'reg' parameter (see above).
-
void push_32(Bit32u value32)
Pushes a 32-bit value onto the stack.
-
Bit32u pop_32(void)
Pops a 32-bit value off of the stack.
-
void write_virtual_dword(unsigned seg, Bit32u (or Bit64u) offset, Bit32u data)
Writes a 32-bit value to memory. The 'seg' parameter specifies the segment, e.g. BX_SEG_REG_DS. The 'offset' parameter is the virtual address. The 'data' parameter is the 32-bit value to write at the address.
-
Bit32u read_virtual_dword(unsigned seg, (or Bit64u) Bit32u offset)
Reads a 32-bit value from memory. The 'seg' specifies the segment, e.g. BX_SEG_REG_DS. The 'offset' parameter is the virtual address.
Conclusion
If you followed this guide, you should know how to get a (possibly modified) modern Linux kernel running in Bochs and how to experiment with changing the architecture. Where you go from here is up to you. The possibilities for research and learning are almost endless. Certainly you can think of something clever or fun to do with your new skills!
If you have suggestions or questions related to this guide, please don't hesitate to contact me.
